Writeup for Ghost Revenge — FL1TZ SummerRush CTF 2025
Introduction
Hi ! I’m Mohamed Aziz Rahmouni also known as Zyyz . Recently, I authored all the Forensics tasks for FL1TZ SummerRush CTF, and honestly, Ghost Revenge is one of my favorites so far. It’s a challenge that pushed me to mix different techniques and layers, making it really fun and tricky. In this writeup, I’ll walk you through how to solve it step-by-step.
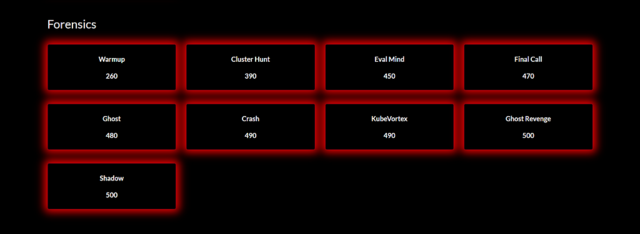
Forensics — FL1TZ SummerRush CTF 2025
So what’s the wait for, let’s get it !
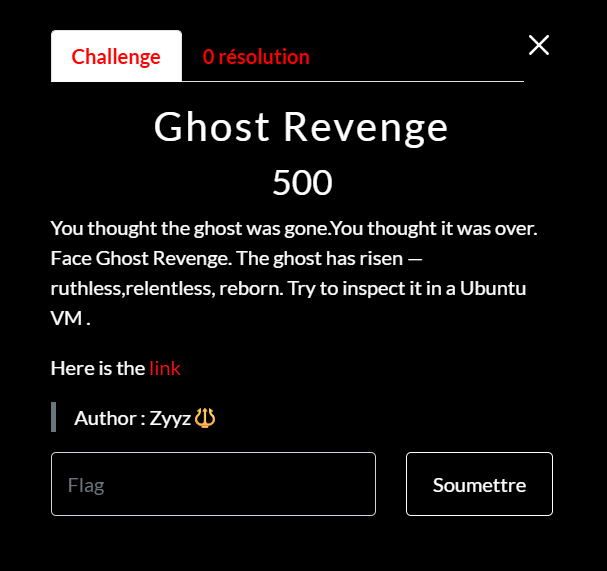
Ghost Revenge
We got a MEGA link, and after downloading it, found two files waiting to be explored .
╭─░▒▓ ~/SummerRush/ghost_revenge/handout ▓▒░─────────────────────────────────────────────────────────────────────────────────────────────────────░▒▓ ✔  at 20:47:43 ▓▒░─╮
╰─ ls -la                                                                                                                                                              ─╯
total 6767504
drwxr-xr-x 2 zyyz zyyz       4096 Jul 25 20:43 .
drwxr-xr-x 3 zyyz zyyz       4096 Jul 25 20:43 ..
-rwxr-xr-x 1 zyyz zyyz  455081984 Jul 25 20:43 FL1TZ_VAULT_1.vdi
-rwxr-xr-x 1 zyyz zyyz 6474823576 Jul 25 20:44 mem.raw
╭─░▒▓ ~/SummerRush/ghost_revenge/handout ▓▒░─────────────────────────────────────────────────────────────────────────────────────────────────────░▒▓ ✔  at 20:47:54 ▓▒░─╮
╰─ file *                                                                                                                                                              ─╯
FL1TZ_VAULT_1.vdi: VirtualBox Disk Image, major 1, minor 1 (<<< Oracle VirtualBox Disk Image >>>), 5709578240 bytes
mem.raw:           ELF 64-bit LSB core file, x86-64, version 1 (SYSV)
So, after checking the files, we have a FL1TZ_VAULT_1.vdi — a VirtualBox disk image — and mem.raw, a Linux memory dump. Honestly, linux memory dumps aren’t my favorite, but let’s start with the VDI and see what’s inside. We could attach the VDI directly to an existing Ubuntu VM, but I decided to convert it to a raw disk image for easier and more flexible analysis . To convert it to a raw disk image, we’ll use vboxmanage, the VirtualBox command-line tool.
PS C:\Program Files\Oracle\VirtualBox> .\VBoxManage.exe clonehd "C:\Users\Aziz\Documents\FL1TZ SummerRush CTF\Forensics\ghost revenge\FL1TZ_VAULT_1.vdi" "C:
\Users\Aziz\Downloads\disk.raw" --format RAW
0%...10%...20%...30%...40%...50%...60%...70%...80%...90%...100%
Clone medium created in format 'RAW'. UUID: c06a67ec-1c13-44d3-89f4-77db7d8d3f73
For this step, we used PowerShell instead of WSL to run the VBoxManage command directly on Windows. No need to mess around with path conversions or parsing — it just worked smoothly.
╭─░▒▓ ~/SummerRush/ghost_revenge/handout/writeup ▓▒░─────────────────────────────────────────────────────░▒▓ INT х  at 21:28:40 ▓▒░─╮
╰─ file disk.raw                                                                                                                   ─╯
disk.raw: LUKS encrypted file, ver 2, header size 16384, ID 3, algo sha256, salt 0x535b71eb3f7ba569..., UUID: b7ed56b9-3064-4d51-aad8-7977b5216776, crc 0xbd6934bfb7cfbf63..., at 0x1000 {"keyslots":{"0":{"type":"luks2","key_size":64,"af":{"type":"luks1","stripes":4000,"hash":"sha256"},"area":{"type":"raw","offse
The file command showing disk.raw as a LUKS encrypted file version 2 means the raw disk image you got contains a LUKS (Linux Unified Key Setup) encrypted partition rather than a plain unencrypted filesystem or disk image. If you’re not familiar with LUKS or encrypted disk images, you can read more about how full & partial disk encryption works in Linux and how LUKS fits into it here:
How LUKS works with Full Disk Encryption in Linux
To work with this encrypted disk image, we first need to install cryptsetup, a tool used to manage LUKS encryption on Linux. On Debian/Ubuntu, install it with:
sudo apt-get update && sudo apt-get install cryptsetup
Before trying to brute-force or guess anything, let’s inspect the LUKS header using luksDump to see what we’re dealing with:
╭─░▒▓ ~/SummerRush/ghost_revenge/handout/writeup ▓▒░───────────────────────────────────────────────────────────────────────────────░▒▓ ✔  at 21:44:49 ▓▒░─╮
╰─ sudo cryptsetup luksDump disk.raw                                                                                                                     ─╯
LUKS header information
Version:        2
Epoch:          3
Metadata area:  16384 [bytes]
Keyslots area:  16744448 [bytes]
UUID:           b7ed56b9-3064-4d51-aad8-7977b5216776
Label:          (no label)
Subsystem:      (no subsystem)
Flags:          (no flags)

Data segments:
  0: crypt
        offset: 16777216 [bytes]
        length: (whole device)
        cipher: aes-xts-plain64
        sector: 512 [bytes]

Keyslots:
  0: luks2
        Key:        512 bits
        Priority:   normal
        Cipher:     aes-xts-plain64
        Cipher key: 512 bits
        PBKDF:      argon2id
        Time cost:  4
        Memory:     545446
        Threads:    1
        Salt:       bd 08 8e b1 48 86 c5 54 e9 a4 cc af df 81 bd 10
                    f4 56 d6 e6 7f 35 7a 63 fa f1 85 d9 3c d4 bb 17
        AF stripes: 4000
        AF hash:    sha256
        Area offset:32768 [bytes]
        Area length:258048 [bytes]
        Digest ID:  0
Tokens:
Digests:
  0: pbkdf2
        Hash:       sha256
        Iterations: 558942
        Salt:       c0 5b 57 65 3c a9 af 02 08 bf 53 ba 9c 22 31 dd
                    fa f7 d6 31 1b 55 47 05 bf 52 f9 af f2 08 47 a3
        Digest:     ef 40 73 b3 f4 a8 67 14 0a 93 12 be 2c c0 76 67
                    c0 c4 bf bd c0 ef 47 58 0f 23 16 93 65 73 31 21
- It’s a LUKS2 volume using AES-XTS with a 512-bit key.
- PBKDF is argon2id, which is memory-hard — good for protection, bad news if you’re thinking brute-force.
- There’s one keyslot enabled, which means the volume is unlockable (we just need the right passphrase).
I know this is a dumb idea but let’s try to extract the LUKS password hash using luks2john for offline brute-forcing with John the Ripper .
sudo ./luks2john disk.raw > luks.hash
john --wordlist=rockyou.txt luks.hash
Unfortunately, this yielded nothing — no successful cracks or useful output, likely due to the use of Argon2id with high memory and time cost parameters, making brute-forcing infeasible without a very strong hint or reduced parameters.
Then,I realized I had overlooked something crucial — a Linux memory dump was also provided. Since LUKS volumes are decrypted in memory once unlocked, there’s a chance the master key or even the passphrase might be lingering in RAM!
After searching online, we came across an interesting tool: findaes. It’s a small utility designed to scan memory dumps and locate AES keys by identifying patterns typical of AES key schedules.
Since LUKS uses AES-XTS, there’s a chance the volume master key (VMK) might be sitting in memory unprotected — especially if the disk was mounted when the memory dump was taken.
After running this command to extract the key , we got this output :
╭─░▒▓ ~/SummerRush/ghost_revenge/handout ▓▒░─────────────────────────────────────────────────────────────────────────────────────░▒▓ 1 х  at 22:01:34 ▓▒░─╮
╰─ findaes mem.raw                                                                                                                                    ─╯
Searching mem.raw
Found AES-256 key schedule at offset 0xe21f07c8:
34 50 26 17 7f c2 1c c6 4a fb 4d d6 a1 d0 bf ca e7 a2 74 48 62 64 07 fd dc c8 68 72 6c a3 d5 20
Found AES-256 key schedule at offset 0xe21f09b8:
37 81 aa 63 a8 9f 5e 80 02 50 80 85 84 cf a4 29 73 94 02 97 04 ac 5c ed 71 1d 46 2e ad b0 22 49
Found AES-256 key schedule at offset 0xe9b5ec28:
6b 89 2a c6 dc 3f 00 d0 cd 09 e5 f2 32 30 59 af 86 1d 24 a1 e8 59 76 90 b3 07 70 46 1f 69 8d 76
Found AES-256 key schedule at offset 0xe9b5edf8:
6b 89 2a c6 dc 3f 00 d0 cd 09 e5 f2 32 30 59 af 86 1d 24 a1 e8 59 76 90 b3 07 70 46 1f 69 8d 76
Found AES-256 key schedule at offset 0xe9b5f088:
00 01 02 03 04 05 06 07 08 09 0a 0b 0c 0d 0e 0f 10 11 12 13 14 15 16 17 18 19 1a 1b 1c 1d 1e 1f
Found AES-256 key schedule at offset 0xe9b5f638:
dd 3c 53 27 95 3c f3 80 19 5a 3f e1 fd f2 4e 6f b6 21 b2 09 ed f6 38 a2 e0 0a 42 16 40 3c 70 61
Found AES-256 key schedule at offset 0xed896198:
6e 52 6d 34 ad 14 da c4 7d f1 68 f4 55 42 a1 fc d6 1f 65 6b 9f 85 91 51 d4 06 9e 2a 9c a8 ab c6
Found AES-256 key schedule at offset 0xed896368:
6e 52 6d 34 ad 14 da c4 7d f1 68 f4 55 42 a1 fc d6 1f 65 6b 9f 85 91 51 d4 06 9e 2a 9c a8 ab c6
Found AES-256 key schedule at offset 0xed8965f8:
00 01 02 03 04 05 06 07 08 09 0a 0b 0c 0d 0e 0f 10 11 12 13 14 15 16 17 18 19 1a 1b 1c 1d 1e 1f
Found AES-256 key schedule at offset 0xed8a9808:
dd 3c 53 27 95 3c f3 80 19 5a 3f e1 fd f2 4e 6f b6 21 b2 09 ed f6 38 a2 e0 0a 42 16 40 3c 70 61
Found AES-256 key schedule at offset 0xed8a9a98:
00 01 02 03 04 05 06 07 08 09 0a 0b 0c 0d 0e 0f 10 11 12 13 14 15 16 17 18 19 1a 1b 1c 1d 1e 1f
Found AES-256 key schedule at offset 0x1025b8878:
79 48 cb b8 8a 02 64 36 c6 9a ff 2c d3 88 fb fb e5 62 ad 9b 4a ba 20 0b 59 30 2e 5b 69 c0 2a 30
Found AES-256 key schedule at offset 0x1025b8a58:
d9 8b 2a 94 29 85 ae 55 25 2c 24 b4 c4 db 87 58 33 37 0e 41 78 a2 52 0e 89 21 f0 5f 1d 76 83 87
Found AES-256 key schedule at offset 0x1025b8c38:
d9 72 3b ef 46 33 01 41 49 86 26 eb 33 f5 f3 7c 45 f3 4b 99 31 33 c4 5b 99 be 5c 1e 73 1b e5 82
Found AES-256 key schedule at offset 0x1025b8e18:
d7 fd db 8e 4e 72 23 bd a3 c6 b0 0e 74 a6 27 dc 9e b3 23 aa 87 b3 08 82 17 73 8c ad fc 45 a4 8b
Found AES-256 key schedule at offset 0x1025b8ff8:
33 0f 34 f4 94 87 00 23 86 c3 d1 db 17 7a c3 9d 14 70 8f 6d 4d 5f b1 f8 71 32 ee 23 62 1a 83 65
Found AES-256 key schedule at offset 0x1025b91d8:
6a e6 5e 2a 47 9a 0c 1a b4 ed 75 9c fa e9 90 ac 80 81 ff 17 00 ac 99 1b 5a 7c 10 5d 9d ac f5 9d
Found AES-256 key schedule at offset 0x1025b93b8:
e0 59 58 c2 ac c5 91 73 70 df d0 40 d6 20 12 54 28 2e d2 39 6c fb 3b 7e 67 45 ae f7 d9 8e 98 5d
Found AES-256 key schedule at offset 0x1025b9598:
a2 d0 d4 44 04 95 57 2f 02 04 b4 76 ab 4d 73 73 66 aa db 85 62 16 b4 48 cf 1a c4 53 a0 92 3b f6
Found AES-256 key schedule at offset 0x1559bd518:
60 66 4e 4f e0 8b 0d 2b 11 03 60 67 5a d0 13 a5 63 6a 9a 0c ae 03 bc 10 90 66 16 e2 cb 30 6b 21
Found AES-256 key schedule at offset 0x15922caa8:
b7 81 9e a5 39 e2 13 b4 e3 23 a1 ea d9 97 43 ec 61 3f 4d 67 40 79 85 56 b5 06 b9 3b ee 6c f4 7a
Found AES-256 key schedule at offset 0x15923cf18:
12 9b 5f a1 bd aa df e1 9d 6c 20 45 eb 1c 5e 32 b4 7b 63 d7 de 79 3f 9f 22 e9 fc c9 fc ca 06 8c
As we can see, many keys were identified from the memory dump. The AES algorithm generates round keys from the master encryption key, and these round keys are also stored in memory.Since we know the master key should be 512 bits, and the keys we found are 256 bits each, we can narrow our search to pairs of consecutive 256-bit keys in memory that might together form the full master key.Keep in mind that the architecture is Intel x86–64 and since these systems use little-endian encoding, these keys must be combined in reverse order to reconstruct the correct master key.
The disk encryption used in this challenge employs the AES-XTS-plain64 cipher mode. XTS (XEX-based Tweaked CodeBook mode with ciphertext stealing) is a block cipher mode specifically designed for encrypting data on storage devices such as hard disks and SSDs. It combines two AES keys: one for data encryption and one for generating a “tweak” value based on the sector number.The “plain64” suffix indicates that the tweak is derived directly from the 64-bit sector number without additional processing. This tweak ensures that identical plaintext blocks in different sectors encrypt to different ciphertexts, protecting against replay and copy-paste attacks on disk sectors. XTS mode is widely used because it provides strong confidentiality guarantees while preserving the data layout, allowing fast, random-access encryption and decryption of disk sectors. However, it does not provide integrity protection, so detecting tampering requires additional mechanisms. In our case, the master key consists of two concatenated 256-bit keys used respectively for AES encryption and tweak computation, matching the requirements of AES-XTS-plain64. The encryption process is more complex but i tried to be concise . Check out this if you want :
Disk encryption theory - Wikipedia
After eliminating decoy keys — including those filled with simple sequences like 01 02 03—repeated and discounting keys that were unrelated or improperly aligned, we identified a promising pair of AES-256 key schedules at the following offsets:After eliminating decoy keys—including those filled with simple sequences like 01 02 03—and discounting keys that were unrelated or improperly aligned, we identified a promising pair of AES-256 key schedules at the following offsets:
Found AES-256 key schedule at offset 0xe21f07c8:
34 50 26 17 7f c2 1c c6 4a fb 4d d6 a1 d0 bf ca e7 a2 74 48 62 64 07 fd dc c8 68 72 6c a3 d5 20
Found AES-256 key schedule at offset 0xe21f09b8:
37 81 aa 63 a8 9f 5e 80 02 50 80 85 84 cf a4 29 73 94 02 97 04 ac 5c ed 71 1d 46 2e ad b0 22 49
Alright, now we need to create the masterkey and don’t forget the little endian trick !
╭─░▒▓ ~/SummerRush/ghost_revenge/handout ▓▒░──────────────────────────────────────────────────────────────────────────────────────────────────────────────────────────────░▒▓ ✔  took 1m 27s  at 23:34:37 ▓▒░─╮
╰─ echo "3781aa63a89f5e800250808584cfa4297394029704ac5ced711d462eadb02249345026177fc21cc64afb4dd6a1d0bfcae7a27448626407fddcc868726ca3d520" | xxd -r -p > masterkey.key                                       ─╯
Great! Now let’s move on to decrypting the disk image. Fingers crossed this goes smoothly — I’m getting tired of dealing with disks
╭─░▒▓ ~/SummerRush/ghost_revenge/handout/writeup ▓▒░────────────────────────────────────────────────────────────────────────────────────────────────────────────────────────░▒▓ 1 х  took 4s  at 23:42:58 ▓▒░─╮
╰─ cryptsetup luksAddKey --master-key-file=masterkey.key disk.raw                                                                                                                                            ─╯
Enter new passphrase for key slot:
Verify passphrase:
Everything went good ! No errors ! Time to mount lessgooo
╭─░▒▓ ~/SummerRush/ghost_revenge/handout/writeup ▓▒░───────────────────────────────────────────────────────────────────────────────────────────────────────────────────────░▒▓ 1 х  took 15s  at 23:59:53 ▓▒░─╮
╰─ sudo cryptsetup luksOpen disk.raw fl1tz                                                                                                                                                                   ─╯
Enter passphrase for disk.raw:
╭─░▒▓ ~/SummerRush/ghost_revenge/handout/writeup ▓▒░─────────────────────────────────────────────────────────────────────────────────────────────────────────────────────────░▒▓ ✔  took 11s  at 00:00:11 ▓▒░─╮
╰─ mkdir ~/fl1tz_decrypted                                                                                                                                                                                   ─╯
╭─░▒▓ ~/SummerRush/ghost_revenge/handout/writeup ▓▒░───────────────────────────────────────────────────────────────────────────────────────────────────────────────────────────────────░▒▓ ✔  at 00:02:00 ▓▒░─╮
╰─ sudo mount /dev/mapper/fl1tz ~/fl1tz_decrypted                                                                                                                                                            ─╯
After successfully decrypting and mounting the disk, we found two tar files and one seems bigger than the other. There was also a lost+found folder, which is standard on Linux filesystems and can be safely ignored for our purposes.
╭─░▒▓ ∅ ~/fl1tz_decrypted ▓▒░──────────────────────────────────────────────────────────────────────────────────────────────────────────────────────────────────────────────────────────░▒▓ ✔  at 00:04:20 ▓▒░─╮
╰─ ls -la                                                                                                                                                                                                    ─╯
total 259056
drwxr-xr-x 3 root root      4096 Jul 16 01:10 .
drwxr-x--- 9 zyyz zyyz      4096 Jul 26 00:05 ..
-rw-r--r-- 1 root root 132521472 Jul 16 01:10 1.tar
-rw-r--r-- 1 root root 132725760 Jul 16 01:10 2.tar
drwx------ 2 root root     16384 Jul 15 19:50 lost+found
Upon extracting the tar files, we discovered that each one represents a Docker image layer, saved as a separate tar archive. This structure is typical for Docker images stored on disk. Honestly, rather than manually carving through the extracted layers, let’s use container-diff to compare the two saved Docker images.container-diff is a powerful tool designed to analyze and compare container images by inspecting differences in file contents, package versions, and more. It can quickly highlight which files have changed between images, helping us focus on relevant modifications without tedious manual inspection.Using container-diff, we can efficiently identify changes between the two Docker image layers and better understand their differences.
GitHub - GoogleContainerTools/container-diff: container-diff: Diff your Docker containers
We ran a container-diff comparison between the two Docker images and uncovered a huge number of file differences. This highlighted extensive changes across the layers, confirming that the images differ significantly.Each group of differing files was organized under distinct directories: one set under etc/ssl, another under tmp, another in usr/share/doc, and yet another within var/lib. This distribution reflects changes spread across various parts of the system.
╭─░▒▓ ∅ ~/fl1tz_decrypted ▓▒░──────────────────────────────────────────────────────────────────────────────────────────────────────────────────────────────────────────────────────────░▒▓ ✔  at 00:11:05 ▓▒░─╮
╰─ container-diff diff 1.tar 2.tar --type=file                                                                                                                                                               ─╯

-----File-----

These entries have been added to 1.tar:
FILE                                SIZE
/etc/ssl/README.md                  230B
/etc/ssl/admin.crt                  1.1K
/etc/ssl/user.crt                   1.1K
/home/ctfuser/.bash_history         292B
/tmp/capture.pcap.pgp               173K
/usr/share/doc/README.md            431B
/usr/share/doc/aes.key.enc          256B
/var/lib/README.md                  279B
/var/lib/pgp_private.asc.aes        6.5K
Since 2.tar is bigger in size so let’s start from it !
╭─░▒▓ ∅ ~/fl1tz_decrypted ▓▒░────────────────────────────────────────────────────────────────────────────────────────────────────────────────────────────────────────────────────────░▒▓ 2 х  at 00:16:01 ▓▒░─╮
╰─ sudo tar -xvf 2.tar                                                                                                                                                                                       ─╯
blobs/
blobs/sha256/
blobs/sha256/008a2c31b31363b59536437480f77755a1e49e275a98ad7fa8c126efb654f287
blobs/sha256/0544e9c395d95b1f857f5afab55269a3a132db418b1aaf11242a5daade753787
blobs/sha256/17ca2293b3b6d2f99c4c1f279017af169208cf53fa86f03dddb1cfc26e33d3b3
blobs/sha256/385eb556134e17ef23cfd59b33526dddab1776f743b3713ff9a08a484ece4aaa
blobs/sha256/5f70bf18a086007016e948b04aed3b82103a36bea41755b6cddfaf10ace3c6ef
blobs/sha256/71128e0d94948153fc86f2b0e334214d36dcf170bb16790c643f49d303156545
blobs/sha256/9521d30bb958df3b29d0773eab630740a0a5693198f3632aa9e2677c12775182
blobs/sha256/a44918cb3413419f1db98cb62fe53d568385da23194faeca365eb327d66336dd
blobs/sha256/d20753a0c5bd0390e9043bd7aee3d14fe92e03bed75694acd4242db28812502c
blobs/sha256/dbd6aeb89a5f86811f77568c616aaa1ce840fd75621fb02e7a4eaf797f501dc9
index.json
manifest.json
oci-layout
repositories
Nothing interesting here ! Let’s inspect the blobs !
╭─░▒▓ ∅ ~/fl1tz_decrypted/blobs/sha256 ▓▒░─────────────────────────────────────────────────────────────────────────────────────────────────────────────────────────────────────────────░▒▓ ✔  at 00:17:07 ▓▒░─╮
╰─ file *                                                                                                                                                                                                    ─╯
008a2c31b31363b59536437480f77755a1e49e275a98ad7fa8c126efb654f287: POSIX tar archive
0544e9c395d95b1f857f5afab55269a3a132db418b1aaf11242a5daade753787: JSON text data
17ca2293b3b6d2f99c4c1f279017af169208cf53fa86f03dddb1cfc26e33d3b3: JSON text data
385eb556134e17ef23cfd59b33526dddab1776f743b3713ff9a08a484ece4aaa: POSIX tar archive (GNU)
5f70bf18a086007016e948b04aed3b82103a36bea41755b6cddfaf10ace3c6ef: data
71128e0d94948153fc86f2b0e334214d36dcf170bb16790c643f49d303156545: JSON text data
9521d30bb958df3b29d0773eab630740a0a5693198f3632aa9e2677c12775182: JSON text data
a44918cb3413419f1db98cb62fe53d568385da23194faeca365eb327d66336dd: JSON text data
d20753a0c5bd0390e9043bd7aee3d14fe92e03bed75694acd4242db28812502c: JSON text data
dbd6aeb89a5f86811f77568c616aaa1ce840fd75621fb02e7a4eaf797f501dc9: POSIX tar archive
Let’s begin with the first tar “008a2c31b31363b59536437480f77755a1e49e275a98ad7fa8c126efb654f287”
╭─░▒▓ ∅ ~/fl1tz_decrypted/blobs/sha256 ▓▒░───────────────────────────────────────────────────────────────────────────────────────────────────────────────────────────────────────────░▒▓ 2 х  at 00:19:20 ▓▒░─╮
╰─ sudo tar -xvf 008a2c31b31363b59536437480f77755a1e49e275a98ad7fa8c126efb654f287.tar                                                                                                                        ─╯
etc/
etc/ssl/
etc/ssl/README.md
etc/ssl/admin.crt
etc/ssl/user.crt
home/
home/ctfuser/
home/ctfuser/.bash_history
tmp/
tmp/capture.pcap.pgp
usr/
usr/share/
usr/share/doc/
usr/share/doc/README.md
usr/share/doc/aes.key.enc
var/
var/lib/
var/lib/README.md
var/lib/pgp_private.asc.aes
Great! We’re definitely on the right track. Let’s begin our exploration with the first directory: /etc/ssl
╭─░▒▓ ∅ ~/fl1tz_decrypted/blobs/sha256/etc/ssl ▓▒░─────────────────────────────────────────────────────────────────────────────────────────────────────────────────────────────────────░▒▓ ✔  at 00:21:14 ▓▒░─╮
╰─ file *                                                                                                                                                                                                    ─╯
README.md: Unicode text, UTF-8 text, with CRLF line terminators
admin.crt: PEM certificate
user.crt:  PEM certificate
Inside /etc/ssl, we found two PEM-format certificates labeled admin and user, along with a README file. Let’s start by examining the README to gather any context before diving into the certificates.
╭─░▒▓ ∅ ~/fl1tz_decrypted/blobs/sha256/etc/ssl ▓▒░─────────────────────────────────────────────────────────────────────────────────────────────────────────────────────────────────────░▒▓ ✔  at 00:21:19 ▓▒░─╮
╰─ cat README.md                                                                                                                                                                                             ─╯
#  Welcome to the vault of trust

Your journey begins here .

  **Your mission**:
Retrieve the **key** to pursue the journey.
Explore carefully — nothing here is accidental.

<br>

**– FL1TZ Security Division**
This strongly suggests the two certificates (admin and user) are our starting point. After glancing at other files, many appear to be encrypted, so these certificates definitely mark the beginning of our investigation.
The README hints at a key we need to find, but from the certificates, we can extract their public keys — a logical place to start. Let’s go ahead and extract those public keys and see what we uncover!
╭─░▒▓ ∅ ~/fl1tz_decrypted/blobs/sha256/etc/ssl ▓▒░─────────────────────────────────────────────────────────────────────────────────────────────────────────────────────────────────────░▒▓ ✔  at 00:26:12 ▓▒░─╮
╰─ sudo sh -c "openssl x509 -in admin.crt -pubkey -noout > admin_pubkey.pem"
╭─░▒▓ ∅ ~/fl1tz_decrypted/blobs/sha256/etc/ssl ▓▒░─────────────────────────────────────────────────────────────────────────────────────────────────────────────────────────────────────░▒▓ ✔  at 00:26:46 ▓▒░─╮
╰─ sudo sh -c "openssl x509 -in user.crt -pubkey -noout > user_pubkey.pem"                                                                                                                                   ─╯
Now that we have extracted the two public keys, the author hints that we need to recover a key from them, obviously a private key . After some research, it turns out there is a known RSA vulnerability called the common factor attack — where if two RSA keys share a prime factor, it’s possible to efficiently recover a private key from them . I used this script to find it
from Crypto.PublicKey import RSA
from Crypto.Util.number import inverse, long_to_bytes, GCD

def load_mod_exp(filename):
    with open(filename, 'r') as f:
        key = RSA.import_key(f.read())
        return key.n, key.e

n1, e1 = load_mod_exp("admin_pub.pem")
n2, e2 = load_mod_exp("user_pub.pem")

p = GCD(n1, n2)

if p == 1:
    print("[!] No common prime factor found — not vulnerable.")
    exit(1)

print(f"[+] Shared prime factor found: p = {p}")

q = n1 // p
phi = (p - 1) * (q - 1)
d = inverse(e1, phi)

key = RSA.construct((n1, e1, d, p, q))

with open("recovered_private.pem", "wb") as f:
    f.write(key.export_key("PEM"))
    print("[+] Recovered private key saved as recovered_private.pem")
Upon running it we got successfully our private key .Now, let’s move on to the next directory, /usr/share/doc. Logically, this is our next step because we noticed a PGP private key file named pgp_private.asc.aes, which is AES-encrypted. Additionally, there’s an aes.key.enc file, meaning the AES key itself is encrypted. The only way to decrypt it is likely by using the private key we just recovered.
╭─░▒▓ ∅ ~/fl1tz_decrypted/blobs/sha256/usr/share/doc ▓▒░───────────────────────────────────────────────────────────────────────────────────────────────────────────────────────────────░▒▓ ✔  at 00:39:39 ▓▒░─╮
╰─ ls                                                                                                                                                                                                        ─╯
README.md  aes.key.enc
╭─░▒▓ ∅ ~/fl1tz_decrypted/blobs/sha256/usr/share/doc ▓▒░───────────────────────────────────────────────────────────────────────────────────────────────────────────────────────────────░▒▓ ✔  at 00:39:40 ▓▒░─╮
╰─ cat README.md                                                                                                                                                                                             ─╯
#  Phase 2 — The Encrypted Secret

You’ve found the encrypted key, good job !

 **Objective**:
Decrypt the AES key, now. Only with it you can unlock what lies beyond.

💡 **Hint**:
We follow modern cryptographic practices — padding schemes designed to resist chosen ciphertext attacks are preferred.
---

 *Only those who understand the trust chain can break the cipher.*
The README gives us a crucial hint about the encryption: it mentions modern cryptographic practices and padding schemes designed to resist chosen ciphertext attacks. This strongly suggests the AES key is encrypted using RSA with OAEP padding. So let’s give it a shot then !OAEP is widely used because it adds randomness and security against certain attacks, unlike older padding methods.
╭─░▒▓ ∅ ~/fl1tz_decrypted/blobs/sha256/usr/share/doc ▓▒░─────────────────────────────────────────────────────────────────────────────────────────────────────────────────────────────░▒▓ 1 х  at 00:46:40 ▓▒░─╮
╰─ sudo openssl pkeyutl -decrypt -in aes.key.enc -inkey recovered_private.pem -out aes_decrypted.key -pkeyopt rsa_padding_mode:oaep                                                                          ─╯
We’ve successfully decrypted the AES key using our recovered RSA private key and the correct OAEP padding scheme, just as the hint in the README suggested.
Let’s now move forward and verify if this key works by attempting to decrypt the PGP private key we spotted earlier — the file named private.asc.aes.
Time to head into the next directory: /var/lib. Let’s keep pushing — we’re getting closer. 🔍🔐
╭─░▒▓ ∅ ~/fl1tz_decrypted/blobs/sha256/var/lib ▓▒░─────────────────────────────────────────────────────────────────────────────────────────────────────────────────────────────────────░▒▓ ✔  at 00:48:54 ▓▒░─╮
╰─ ls                                                                                                                                                                                                        ─╯
README.md  pgp_private.asc.aes
╭─░▒▓ ∅ ~/fl1tz_decrypted/blobs/sha256/var/lib ▓▒░─────────────────────────────────────────────────────────────────────────────────────────────────────────────────────────────────────░▒▓ ✔  at 00:48:55 ▓▒░─╮
╰─ cat README.md                                                                                                                                                                                             ─╯
#  Phase 3 — The dead lock

Use what you have found wisely !

 **Objective**:
You know what to do !

💡 **Hint**:
- AES-256-CBC
- pbkdf2
---

## No more hints in the next phases, you are on your own from now on , GLHF !
Well, no worries. We’ve come too far to stop here — we’re getting the revenge, hint or no hint 😤.
The encryption mode and key derivation function are clearly mentioned:
- AES-256 in CBC mode
- PBKDF2 for deriving the decryption key
╭─░▒▓ ∅ ~/fl1tz_decrypted/blobs/sha256/var/lib ▓▒░───────────────────────────────────────────────────────────────────────────────────────────────────────────────────────────────────░▒▓ 1 х  at 00:54:47 ▓▒░─╮
╰─ sudo openssl enc -d -aes-256-cbc -salt -pbkdf2 -in pgp_private.asc.aes -out pgp_private_decrypted.asc -pass file:aes_decrypted.key                                                                        ─╯
No erros ! I think all went good ! We’ve reached the final stage — and there’s only one obstacle left standing between us and total revenge: capture.pcap.pgp.
As expected, it’s PGP-encrypted, and now that we’ve successfully recovered the pgp key, it’s time to put it to use. Time to finish what we started. 💀🔓PGP (Pretty Good Privacy) is a widely-used encryption standard designed for securing files and communications. It uses a hybrid cryptosystem: combining asymmetric encryption (public/private key pair) for key exchange with symmetric encryption for the actual data.GnuPG (gpg) is the open-source implementation of PGP and handles keys through an internal keyring — a secure database that keeps track of all the imported keys.🗂 Where GPG Stores Keys:~/.gnupg/pubring.kbx → Stores public keys~/.gnupg/private-keys-v1.d/ → Stores private keysThese locations are used automatically by GPG. When you have a key in .asc format (ASCII-armored), GPG doesn’t use it directly from your current directory — it needs to be imported into the keyring first.
Alright, we got this ! let’s go then !
╭─░▒▓ ~/fl1tz_decrypted/blobs/sha256/tmp ▓▒░───────────────────────────────────────────────────────────────────────────────────────────────────────────────────────────────────────────░▒▓ ✔  at 01:01:44 ▓▒░─╮
╰─ gpg --import pgp_private_decrypted.asc                                                                                                                                                                    ─╯
gpg: /home/zyyz/.gnupg/trustdb.gpg: trustdb created
gpg: key D07F2ACEB24A36A0: public key "FL1TZ admin (the key to the truth) <admin@fl1tz.com>" imported
gpg: key D07F2ACEB24A36A0: secret key imported
gpg: Total number processed: 1
gpg:               imported: 1
gpg:       secret keys read: 1
gpg:   secret keys imported: 1

╭─░▒▓ ~/fl1tz_decrypted/blobs/sha256/tmp ▓▒░───────────────────────────────────────────────────────────────────────────────────────────────────────────────────────────────────────────░▒▓ ✔  at 01:01:51 ▓▒░─╮
╰─ gpg --output decrypted_capture.pcap --decrypt capture.pcap.pgp                                                                                                                                            ─╯
gpg: encrypted with rsa4096 key, ID 6F1E1AE1832A9C15, created 2025-07-09
      "FL1TZ admin (the key to the truth) <admin@fl1tz.com>"

╭─░▒▓ ~/fl1tz_decrypted/blobs/sha256/tmp ▓▒░───────────────────────────────────────────────────────────────────────────────────────────────────────────────────────────────────────────░▒▓ ✔  at 01:02:54 ▓▒░─╮
╰─ ls                                                                                                                                                                                                        ─╯
capture.pcap.pgp  decrypted_capture.pcap  pgp_private_decrypted.asc

╭─░▒▓ ~/fl1tz_decrypted/blobs/sha256/tmp ▓▒░───────────────────────────────────────────────────────────────────────────────────────────────────────────────────────────────────────────░▒▓ ✔  at 01:03:00 ▓▒░─╮
╰─ file decrypted_capture.pcap                                                                                                                                                                               ─╯
decrypted_capture.pcap: pcap capture file, microsecond ts (little-endian) - version 2.4 (Ethernet, capture length 65535)
💥 We finally recovered the capture.pcap file! 💥
This was the final encrypted piece — the last lock guarding the truth. With the decrypted PCAP now in our hands, we’re ready to dive into network analysis and uncover whatever secrets it holds.
Let’s open it in Wireshark !
Upon opening the capture file we found skype traffic !
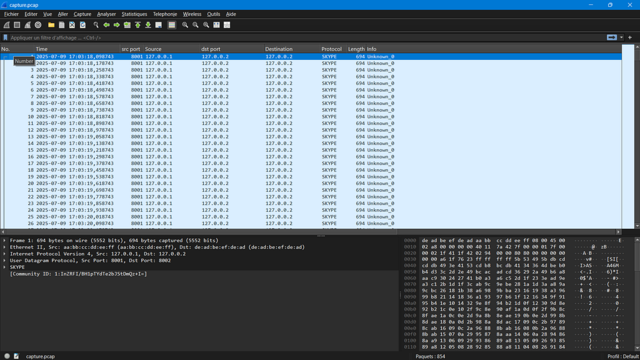
We opened “Protocol Hierarchy” in Wireshark (Statistics → Protocol Hierarchy) to get a high-level view of the captured traffic. Something immediately stood out — RTP (Real-time Transport Protocol) traffic was present. That’s a huge clue.RTP (Real-time Transport Protocol) is a network protocol used to deliver audio and video over IP networks — commonly used in applications like VoIP (Voice over IP), Skype, Zoom, and online video streaming.Unlike protocols like TCP that prioritize reliable delivery, RTP focuses on low-latency transmission, making it ideal for real-time communication. It works alongside UDP, which means it doesn’t guarantee delivery — but it ensures fast, continuous streams.Each RTP packet carries chunks of media (like audio samples), along with sequence numbers and timestamps, allowing the receiver to reconstruct the stream in the correct order and play it back smoothly.
Upon filtering the RTP traffic, we noticed the timestamps were offset — essentially, they were shifted out of sync. To fix this, we adjusted the timestamps back to their correct values, which allowed us to reconstruct the RTP stream properly. With the timestamps corrected, we could now export the RTP packets and prepare them for playback.
Time to listen and see what secrets the captured voice traffic holds !!
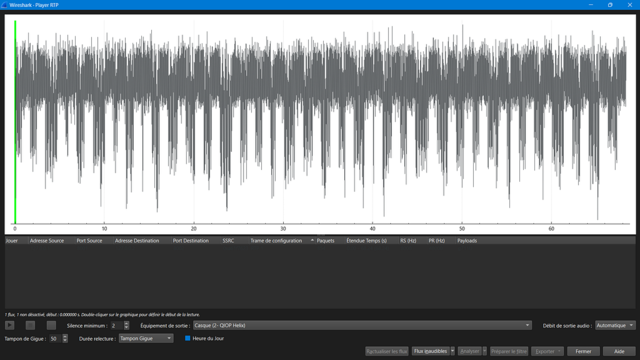
Next, we navigated to Wireshark’s Telephony > RTP > Show All Streams menu, selected the relevant RTP stream. Listening closely, the audio sounded like Morse code!
This is it — we’re almost there. Time to decode the Morse and uncover the final secret !
We exported the audio from the RTP stream and fed it into a Morse code decoder. After a short wait, the decoder revealed our flag — MISSION ACCOMPLISHED ! And here is our flag :FL1TZ{1acec73c955d877f2e7502652a531427}
Final Thoughts :
This challenge was a fantastic journey through multiple layers of cryptography, disk forensics, and network analysis. From extracting and reconstructing the master key of a LUKS-encrypted disk, to peeling apart Docker layers, leveraging subtle cryptographic vulnerabilities to recover private keys — every step tested a different skill.
This challenge took me quite some time to set up and solve. I hope you enjoy the writeup — feel free to share your thoughts or questions!